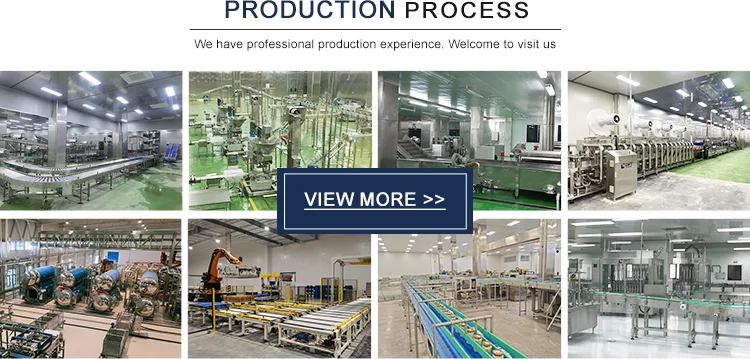
Cherry canned production line process:
1. Branching and sorting
l Branching: Use mechanical or manual methods to separate the cherries that are tied together into single branches for subsequent processing.
l Sorting: Through visual inspection and mechanical screening, remove cherries with mechanical injuries, diseases, insect bites, deformities or insufficient maturity to ensure the quality of raw materials.
2. Grading
l According to the size of the cherry fruit, use a grader for precise grading. Usually divided into three levels: 3-4.58g, 4.6-6g, and 6.1g or above. Grading helps to ensure that the size of the cherries in the can is uniform and improve the appearance quality of the product.
3. Rinse
l Put the graded cherries into clean water for rinsing to remove impurities such as dust and pesticide residues attached to the surface.
l After rinsing, use a vibrating screen or centrifuge to drain the water to reduce the moisture content in subsequent processing.
4. Sorting and canning
l Sorting: Check the integrity, color and stem of the cherries again to ensure that only cherries that meet the standards enter the canning process.
l Canning: According to the grading results, the cherries are separated by size and packed into pre-prepared canning bottles. When canning, pay attention to arranging them neatly to avoid squeezing and deformation.

5. Filling with syrup
l Inject an appropriate amount of syrup on top of the packed cherries. The concentration and amount of syrup must be strictly controlled according to the product formula to ensure the taste and shelf life of the canned food.

6. Evacuation and sealing
l Use a vacuum pump to evacuate the canning bottle to remove the air in the bottle and reduce the possibility of oxidation and bacterial growth.
l Then immediately perform the sealing operation to ensure that the canning bottle is well sealed and prevent external contamination.
7. Sterilization and cooling
l Send the sealed cans into the sterilizer for high-temperature sterilization to kill the microorganisms in the cans and ensure food safety.
l After sterilization, quickly cool the cans to room temperature or lower temperature to prevent the cans from deforming or affecting the quality due to high temperature.

8. Palletizing
lPalletize the cooled cans according to certain specifications and quantities for subsequent storage and transportation.

9. Post-packaging production line
lLabeling: Attach product labels to cans, including brand, specifications, production date, shelf life and other information.
lPackaging: Put the palletized cans into cartons or plastic boxes for outer packaging.
lPacking: Use a baler or manual method to pack and reinforce the cartons to ensure that they are not easily damaged during transportation.
lWarehousing: Send the packaged cans to the warehouse for storage and wait for delivery.

 Your message must be between 20-3,000 characters!
 Please check your E-mail!
  Your message must be between 20-3,000 characters!
 Please check your E-mail!


